

AI Generated image: Brain Tumor Detection Using YOLOv12: Advancing Medical Imaging with AI
This project applies YOLO-based custom detection to identify and classify brain tumors in MRI images. The model is trained on curated medical datasets to support fast and accurate diagnosis.
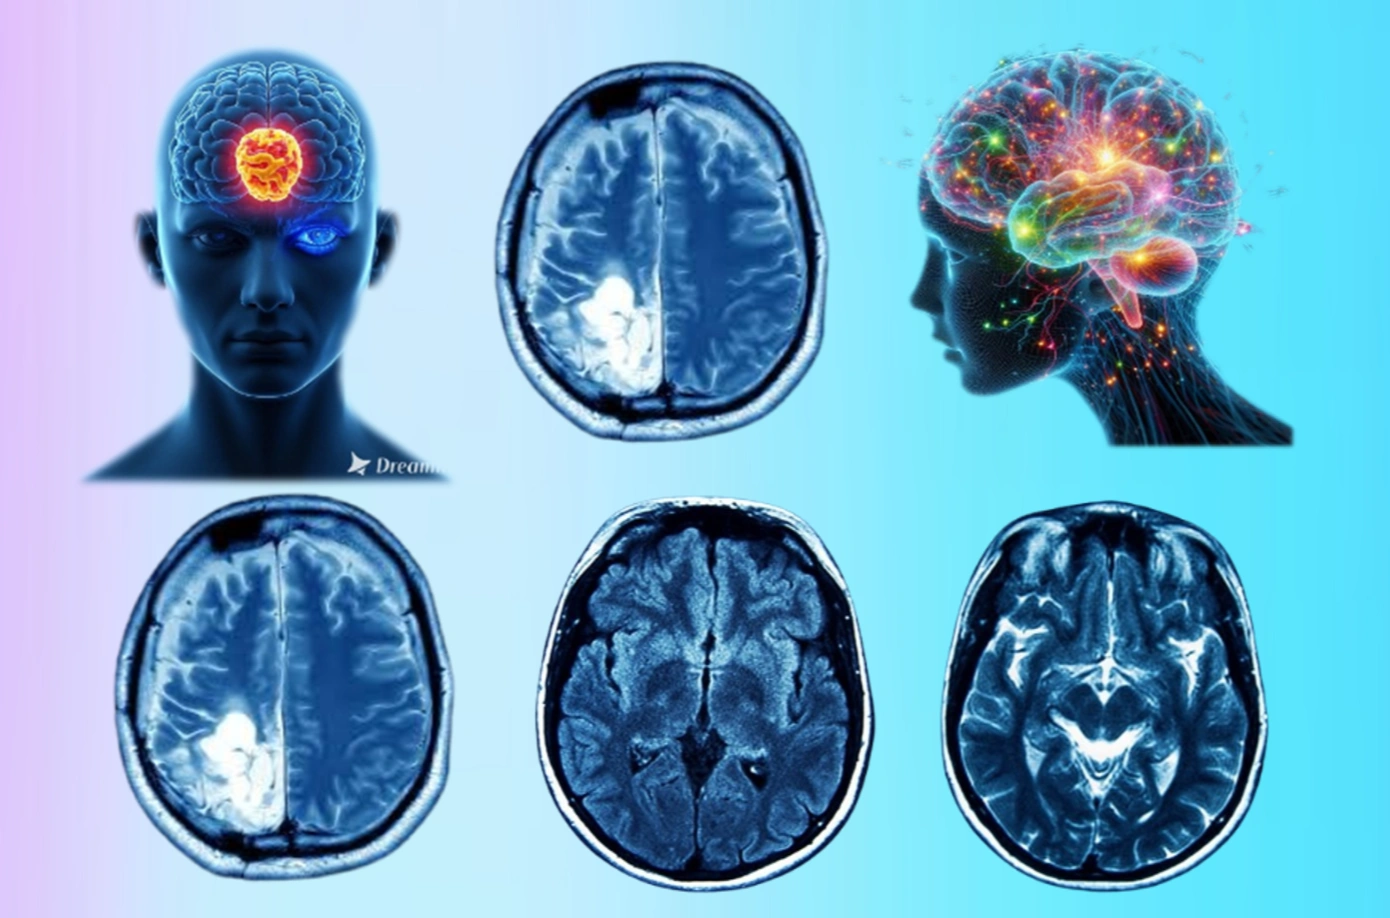
Brain tumor detection
Detecting brain tumors at an early stage is crucial for effective diagnosis and treatment. Advanced deep learning models like YOLOv12 (You Only Look Once) offer state-of-the-art object detection capabilities, making them suitable for medical image analysis. This project focuses on custom training of the YOLOv12 model using a specialized brain tumor dataset. Through rigorous training and evaluation, the objective is to achieve accurate and efficient tumor detection, supporting medical professionals in making timely and informed decisions.
Preparing a custom dataset is a critical step in training the YOLOv12 model for brain tumor detection. It involves gathering, labeling, and preprocessing medical images to ensure the model learns to identify tumors accurately. Here's a step-by-step overview of the process:
The brain tumor dataset, collected from the reputable Roboflow platform, serves as the foundation for training and evaluating the YOLOv12 model. This dataset is meticulously annotated and labeled to ensure accurate detection of brain tumors in medical imaging.
A well-organized directory structure is maintained for seamless model training, typically resembling:
            /dataset
            │
            ├── images
            │   ├── train
            │   ├── val
            │   └── test
            ├── labels
            │   ├── train
            │   ├── val
            │   └── test
            └── data.yaml
The dataset is systematically organized into three primary folders, each playing a crucial role in the model development process:
data.yaml file contains paths to the datasets, class names, and other configuration details
required for YOLOv12 training.With a properly prepared dataset, the YOLOv12 model can be efficiently trained to detect brain tumors, contributing to faster and more accurate diagnoses in medical imaging.
.txt files) containing class labels
and coordinates of the bounding boxes.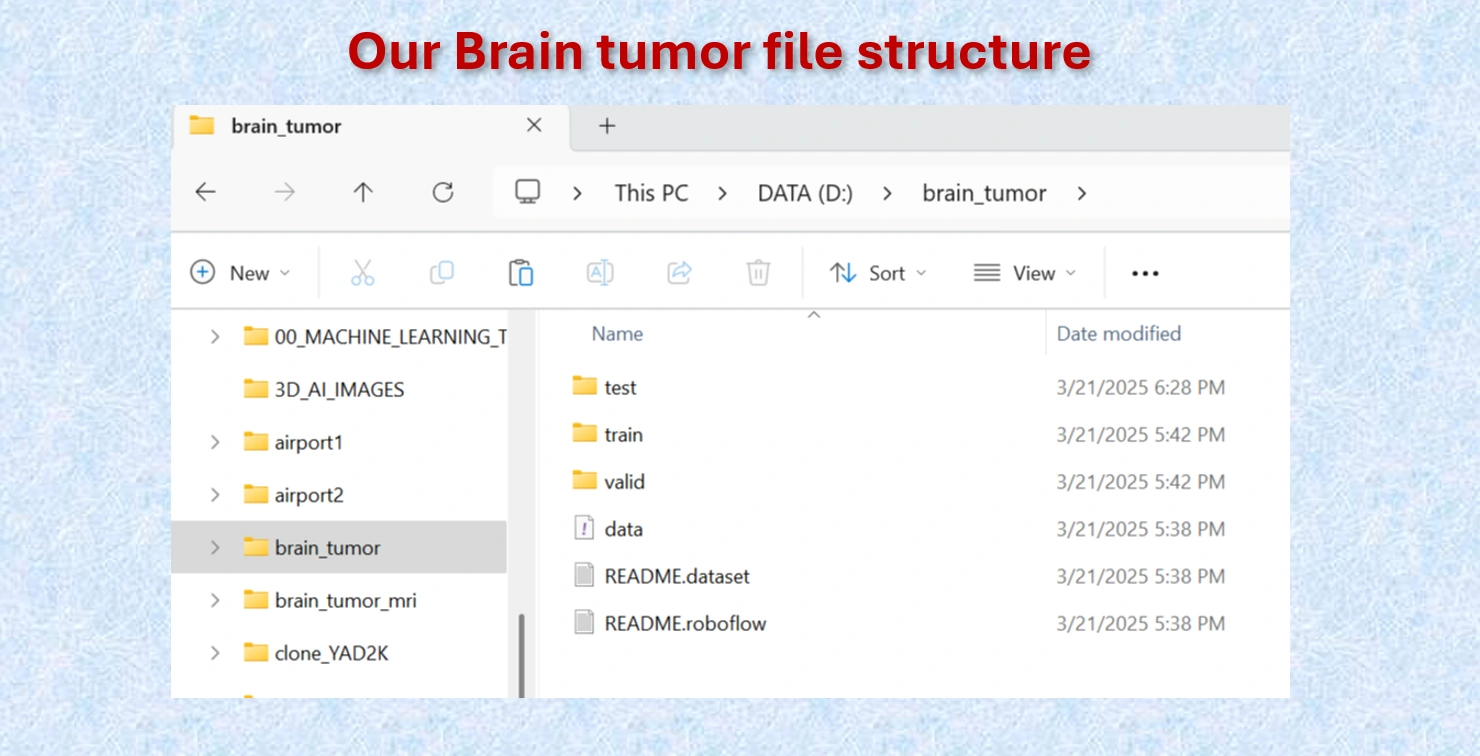
Brain Tumor file structure.
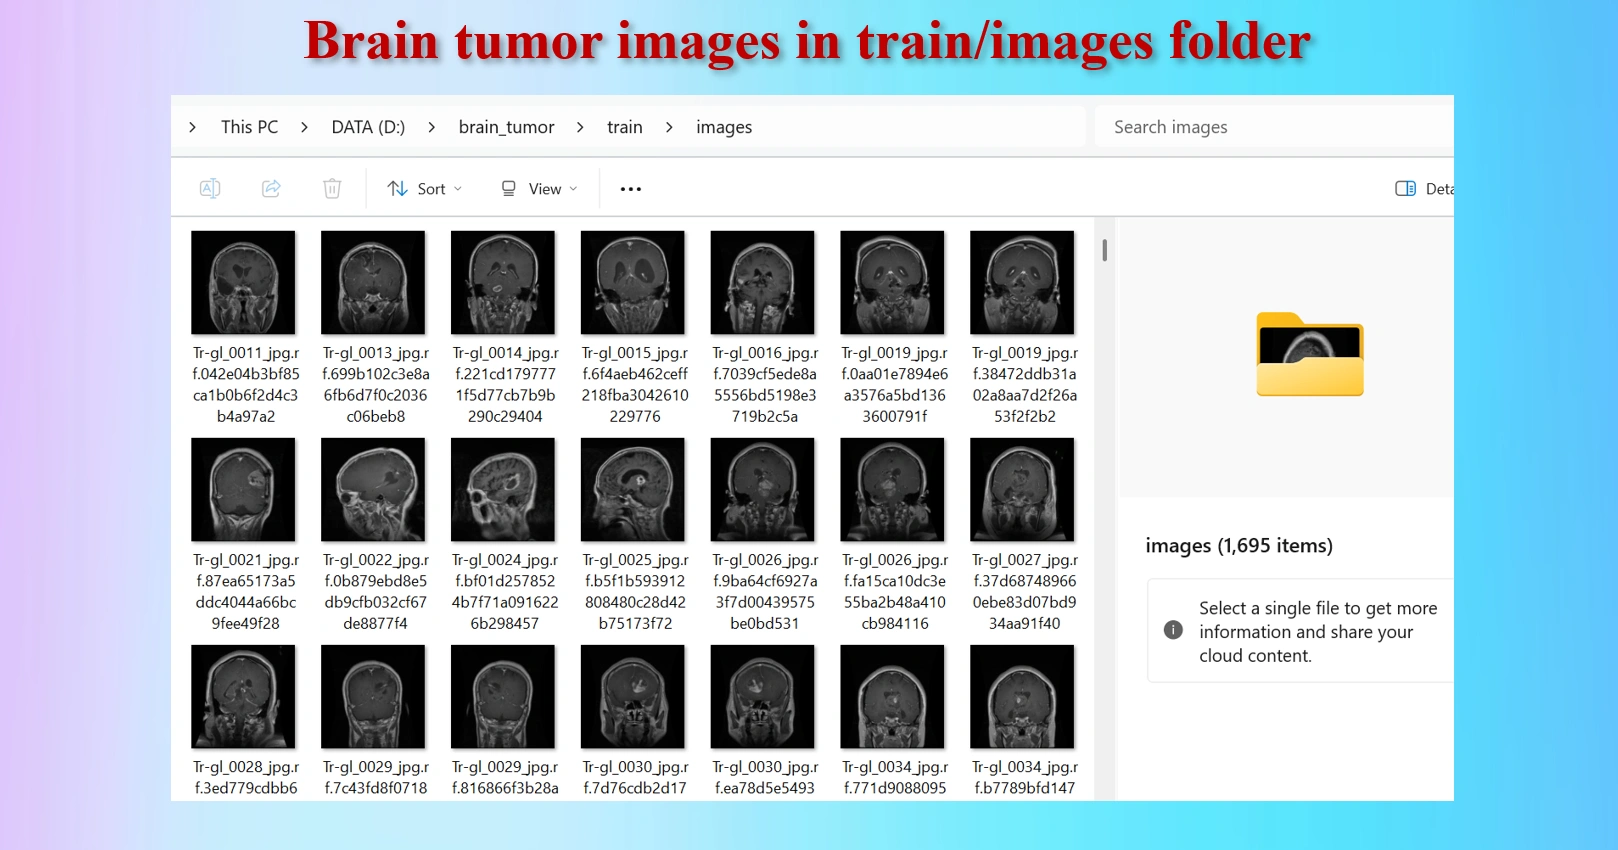
Brain Tumor MRI images in /train/images folders.
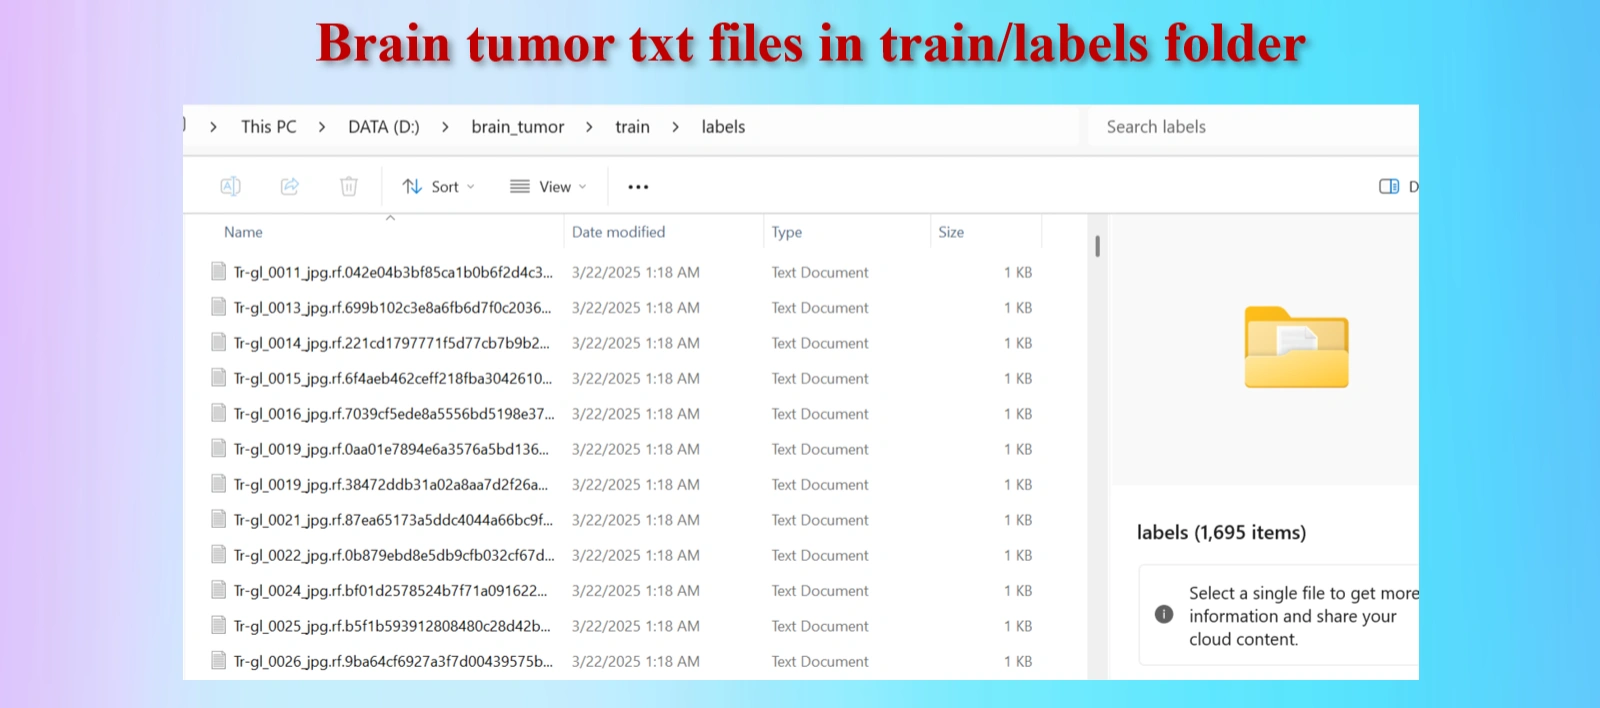
Annotated txt files for each image, with the same name of images.
The downloaded dataset contains 2,443 images and 2,443 txt files.They are distributed as:
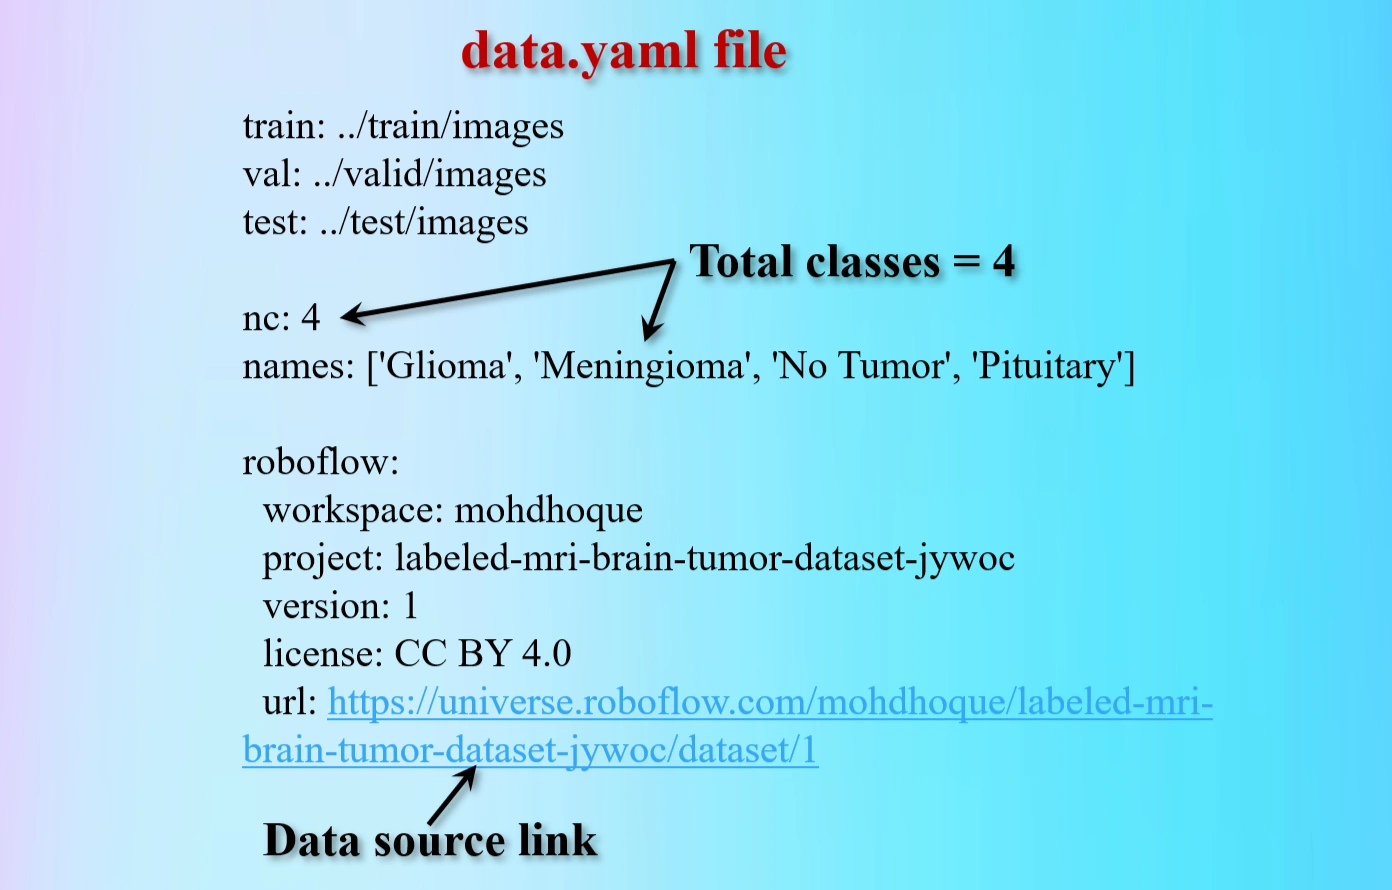
Contents of data.yaml file.
The yaml file contains 4 classes brain tumors:
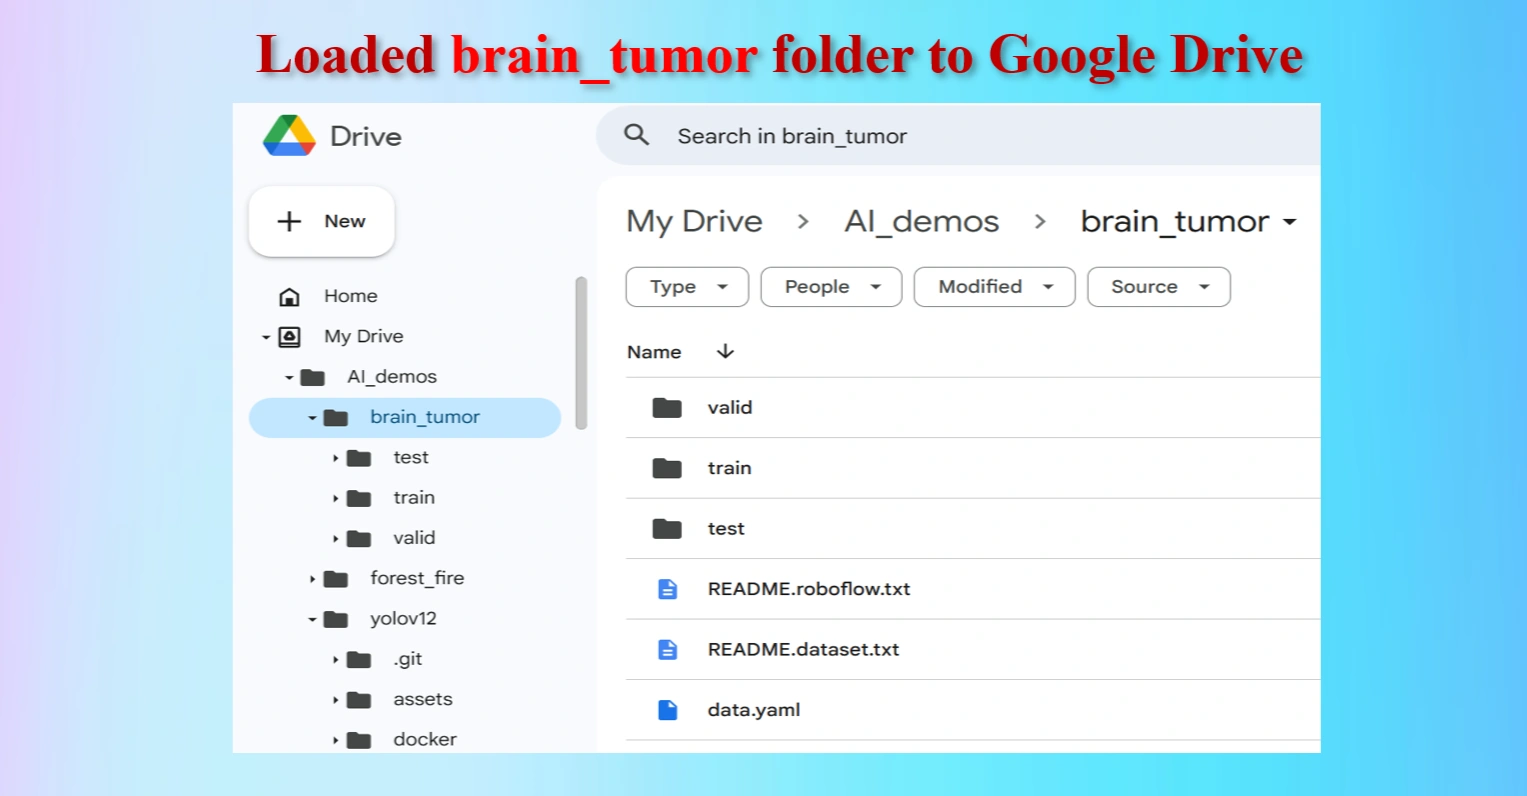
Loaded brain_tumor folder to Google Drive
The uploaded brain_tumor folder contains test, train and val folders including data.yaml file.
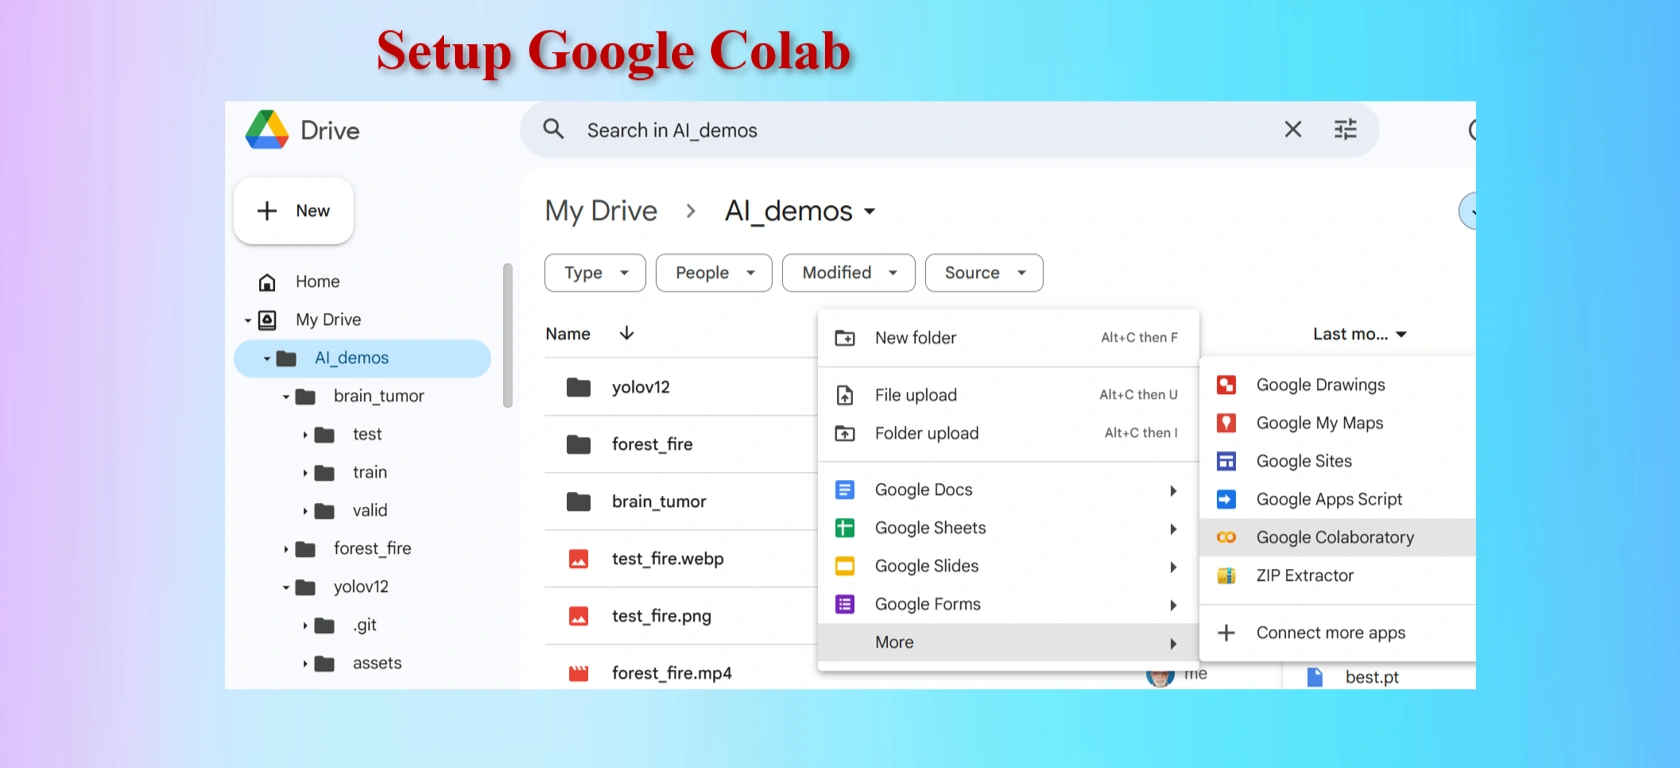
Setting up Google Colab.

Rename Google Colab Notebook brain_tumor.ipynb.
Google Colab offers free access to GPUs like the NVIDIA T4, which is a powerful hardware accelerator specifically designed for deep learning tasks. Using a GPU instead of a CPU can dramatically improve the speed and efficiency of your machine learning workflows.
Runtime → Change runtime type → GPU to connect a GPU in Colab.For deep learning projects, using a T4 GPU on Google Colab is a game-changer. It significantly reduces training time, improves model accuracy with larger datasets, and provides a seamless experience for machine learning experiments. While CPUs are suitable for small-scale tasks, they are inefficient for advanced AI projects.
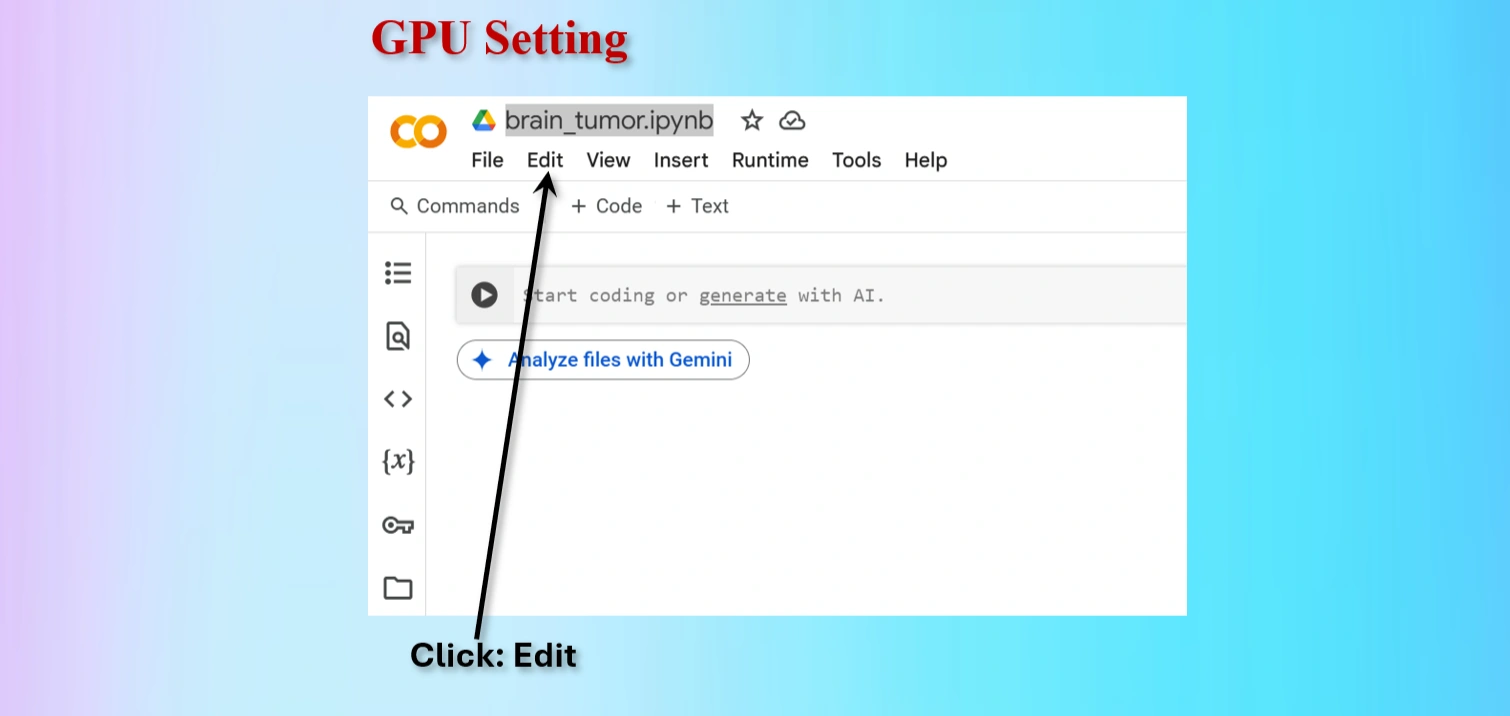
Click on Edit menu on Colab
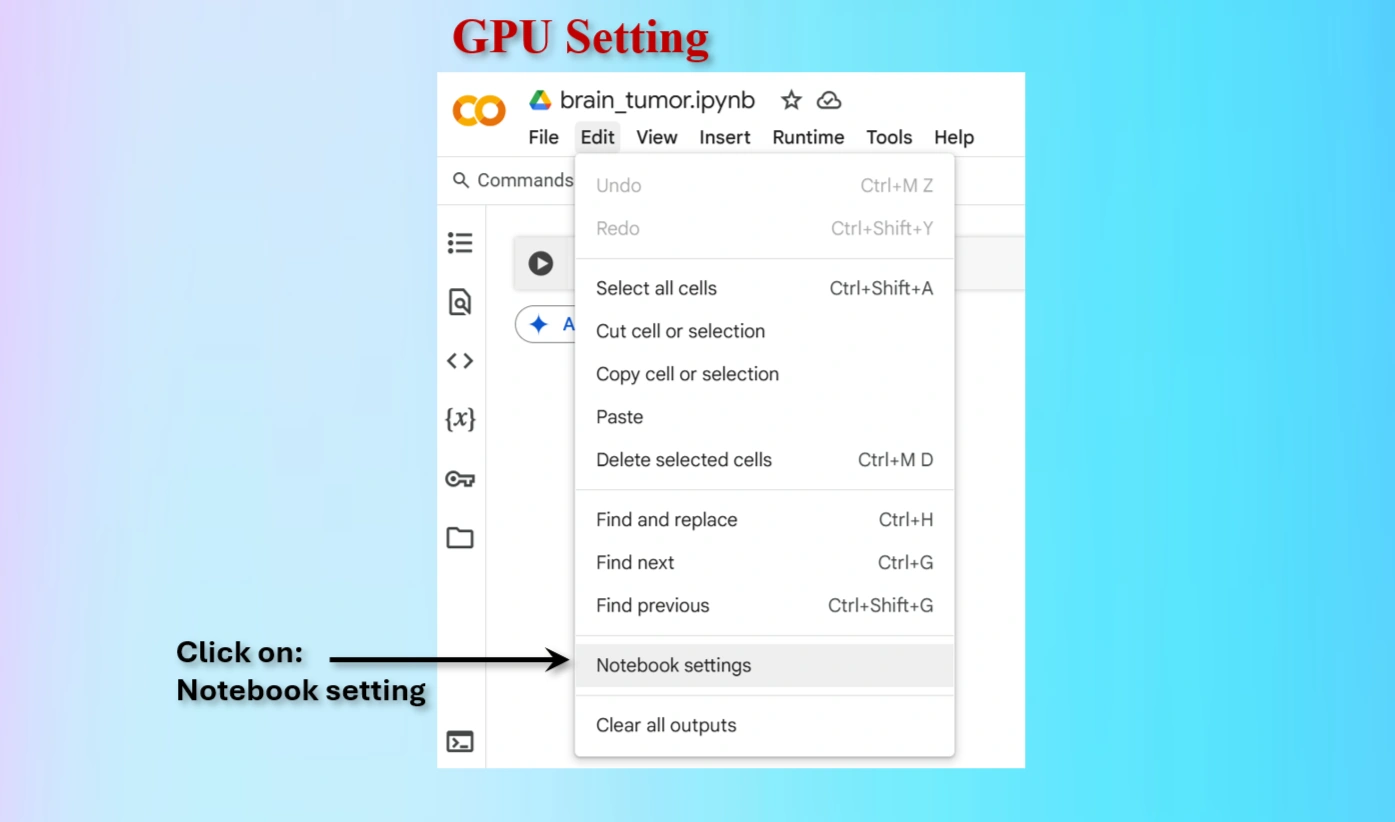
Click on Notebook setting on Colab
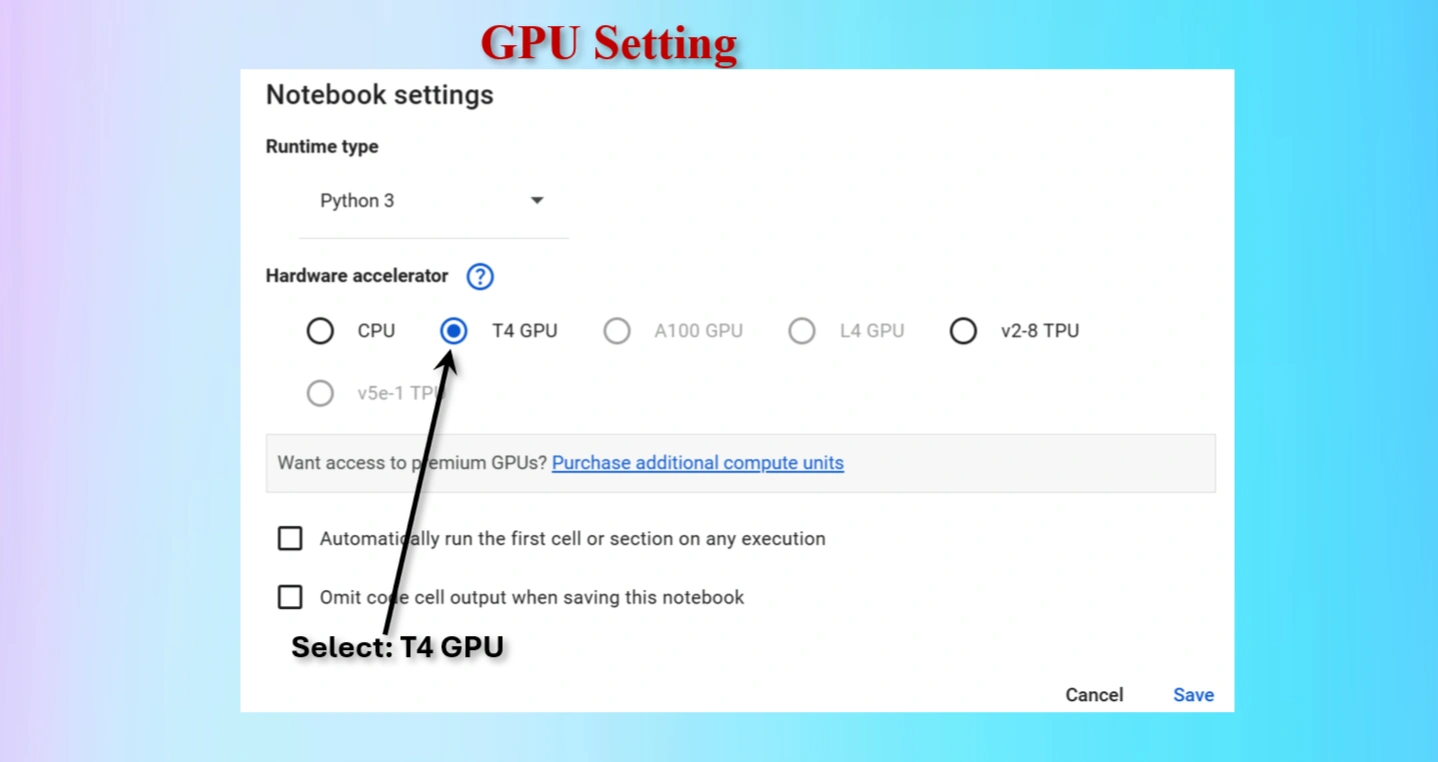
Select T4 GPU and save

Check whether GPU is available or not.
            GPU is available: True
            GPU name: Tesla T4
Output indicates that GPU is available.
            CODES to check GPU availability:

            import torch
            print("GPU is available:", torch.cuda.is_available())
            print("GPU name:", torch.cuda.get_device_name(0) if torch.cuda.is_available() else "No GPU found")

Mount Google drive
            Codes:

            from google.colab import drive
            drive.mount('/content/drive')
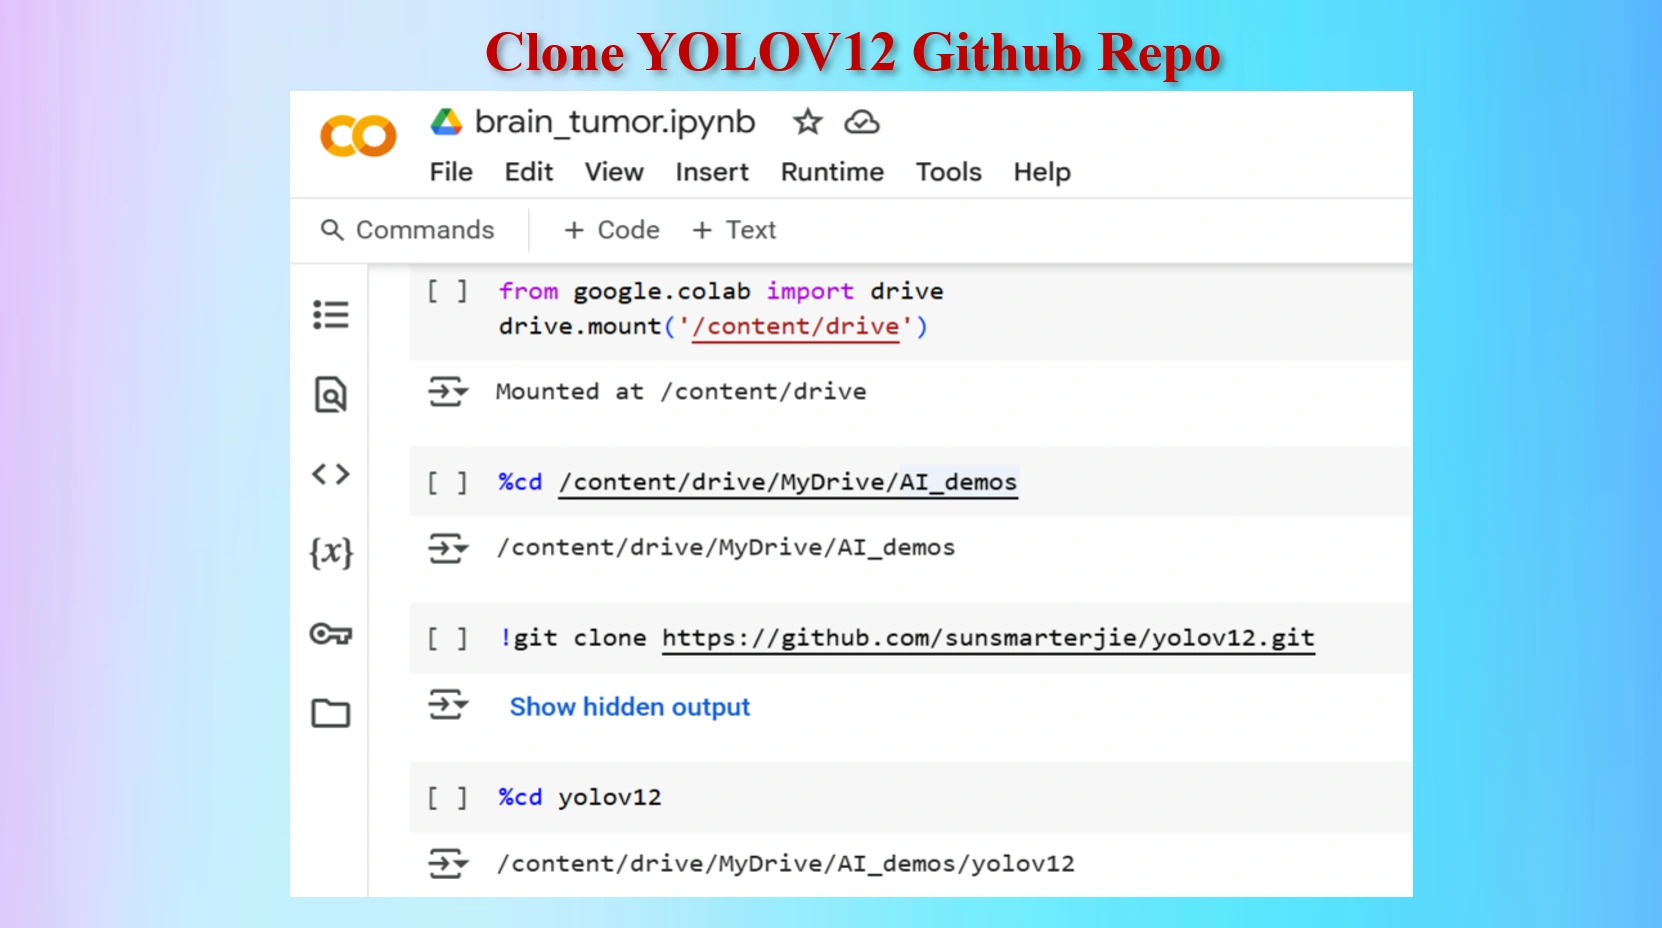
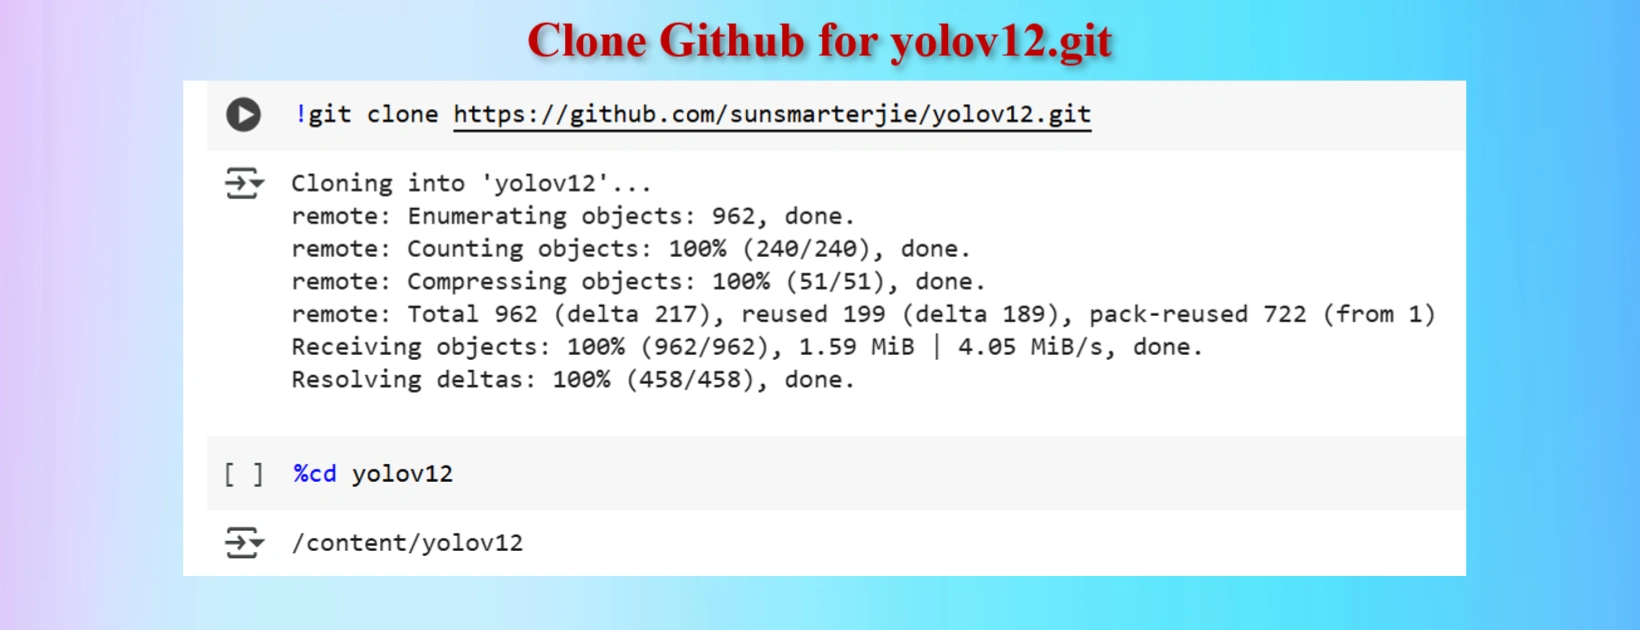
Clone YOLOV12 Github in a Google Colab Cell

Created yolov12 Folder in Google Drive
                Codes:

                #Mount Google drive to colab cell
                from google.colab import drive
                drive.mount('/content/drive')

                %cd /content/drive/MyDrive/AI_demos

                #Clone yolov12 Repo
                !git clone https://github.com/sunsmarterjie/yolov12.git

                #Go to newly created yolov12 folder
                %cd yolov12
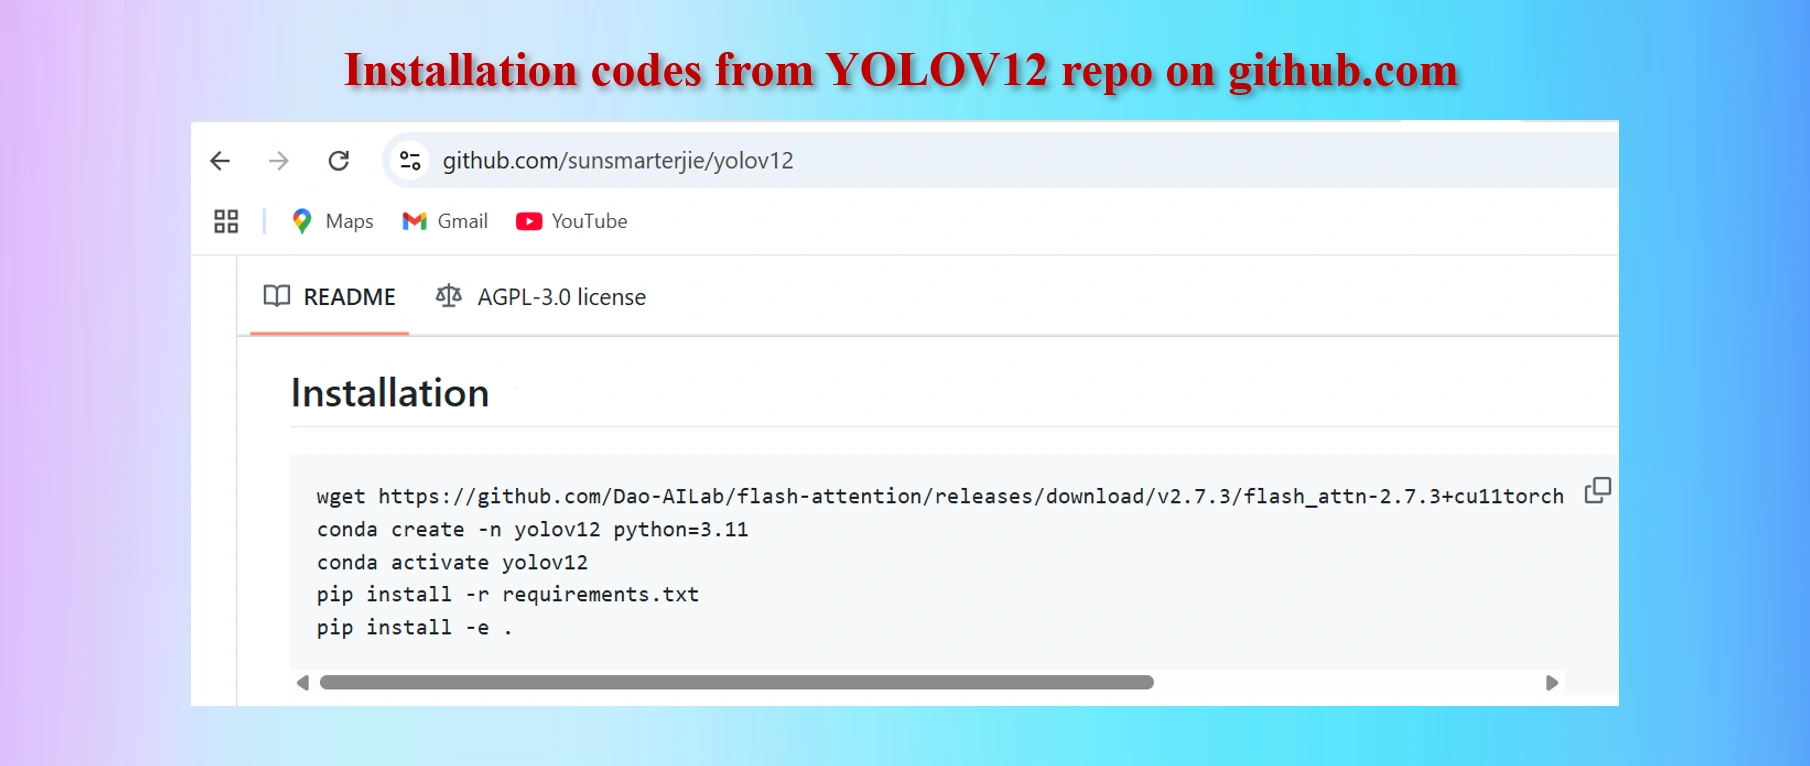
Copy codes from yolov12 github repo
            CODES:

            #Codes to install
            wget https://github.com/Dao-AILab/flash-attention/releases/download/v2.7.3/flash_attn-2.7.3+cu11torch2.2cxx11abiFALSE-cp311-cp311-linux_x86_64.whl
            conda create -n yolov12 python=3.11
            conda activate yolov12
            !pip install -r requirements.txt
            !pip install -e .
We shall have to install lines 1, 4 and 5 above in Colab Notebook cells. However, as we are worlikg in Google Colab environments in Google drive, codes in lines 2 and 3 are not needed. These two lines of codes are needed if we work in a local computer in a separate environment.
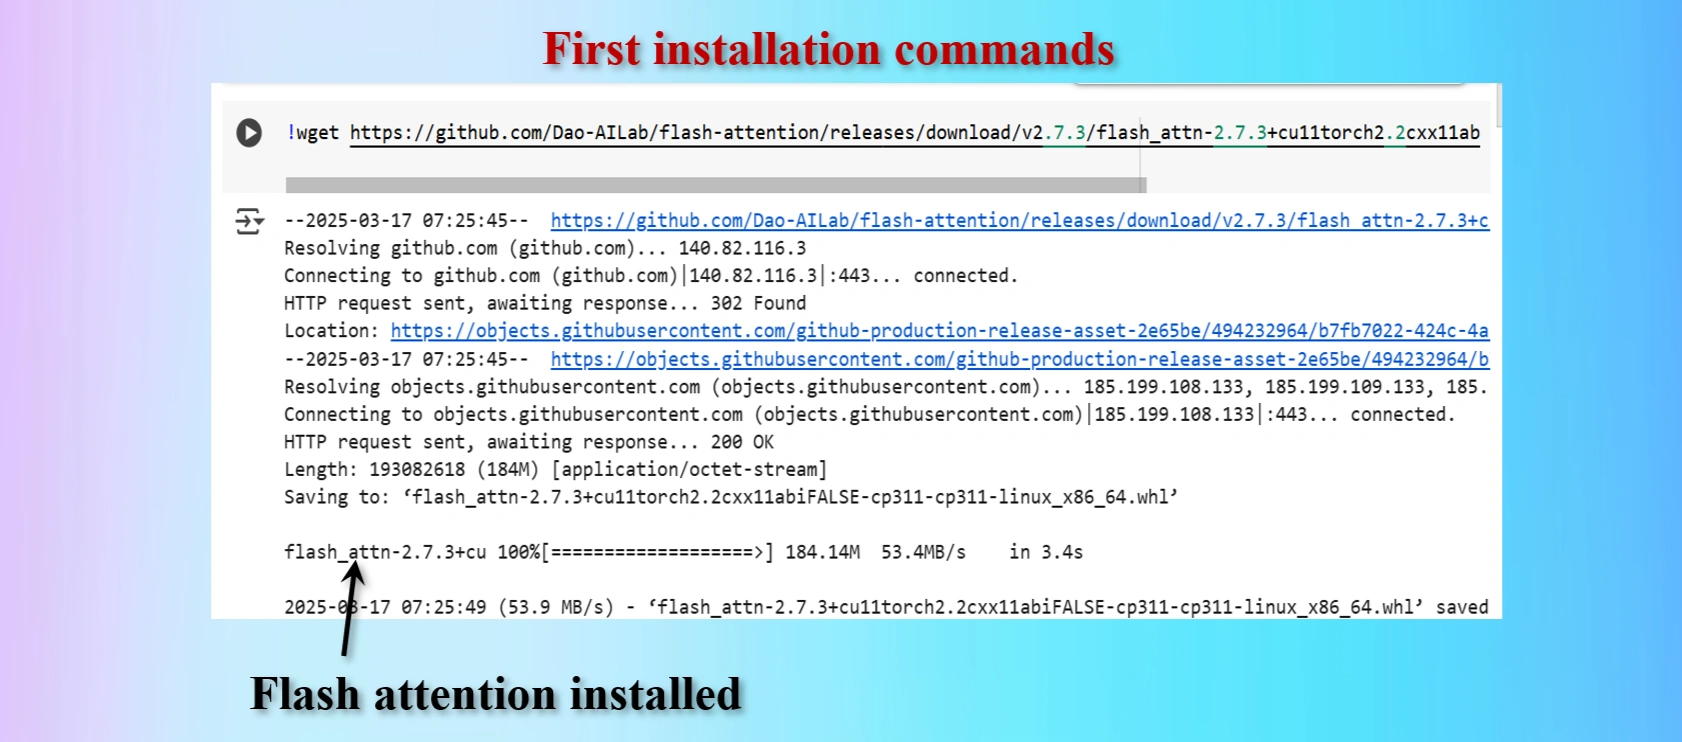
Installed first command copying from yolov12 repo
Displays that Flash_Attention installed
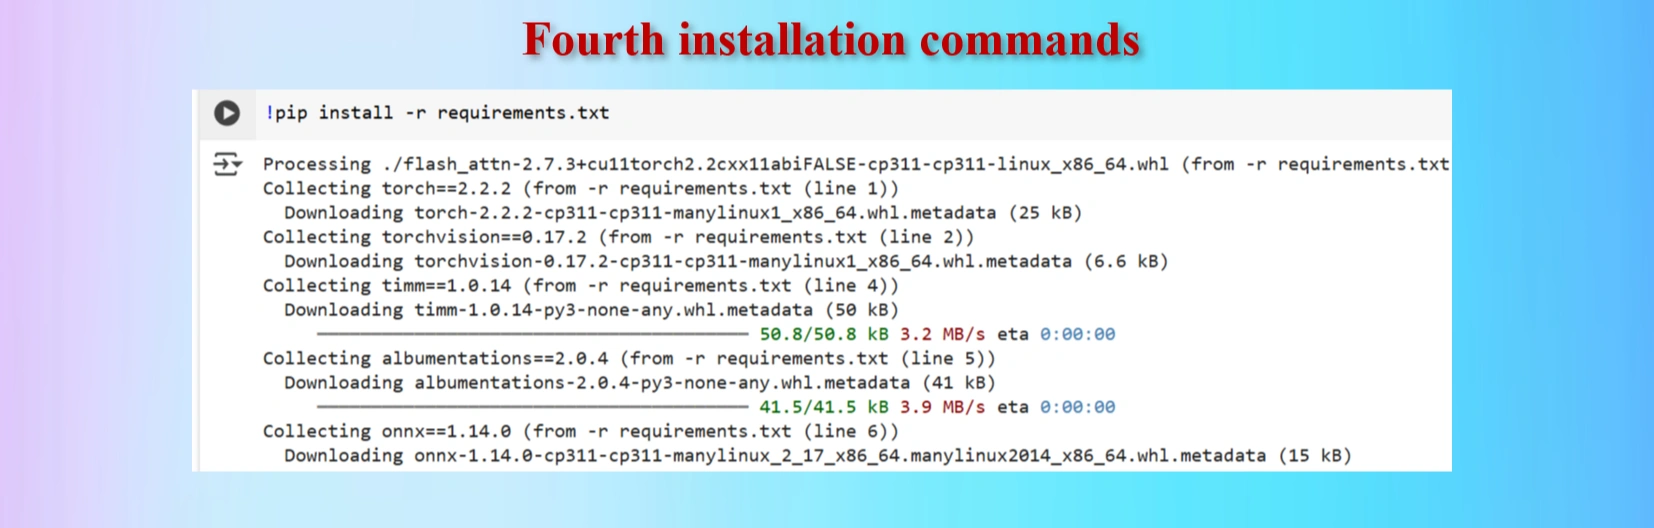
Installed fourth command copying from yolov12 repo
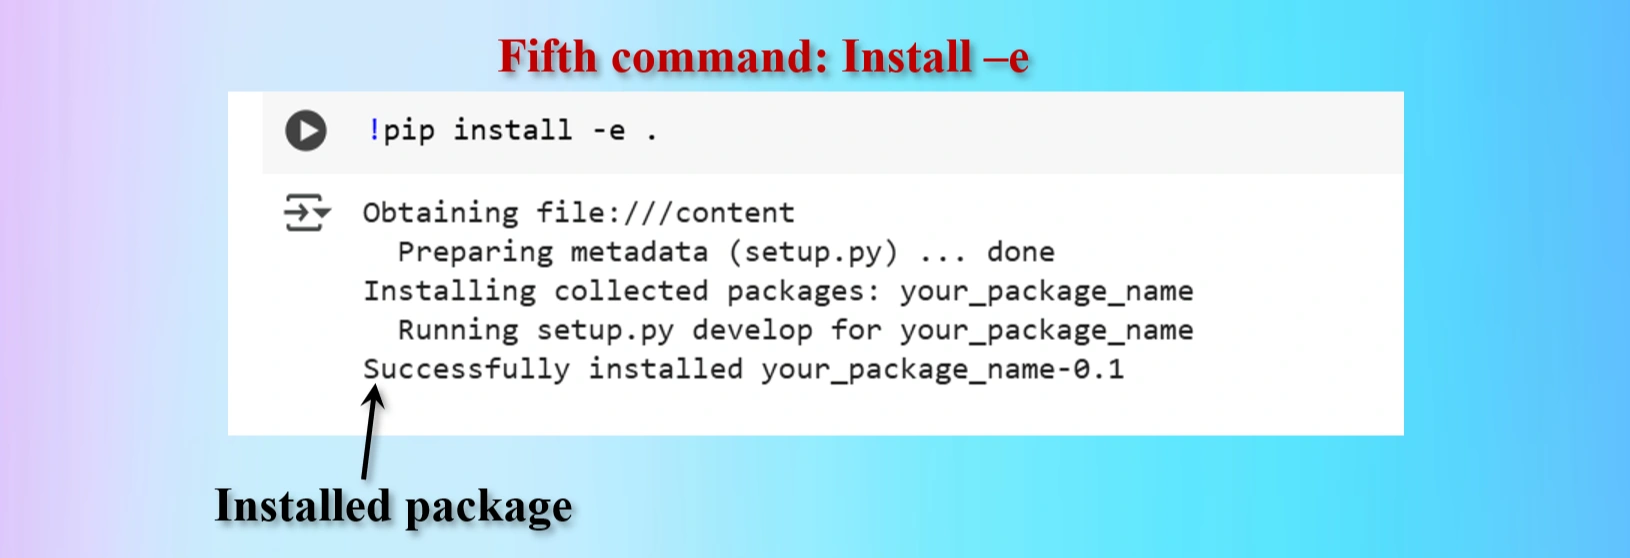
Installed fifth command copying from yolov12 repo
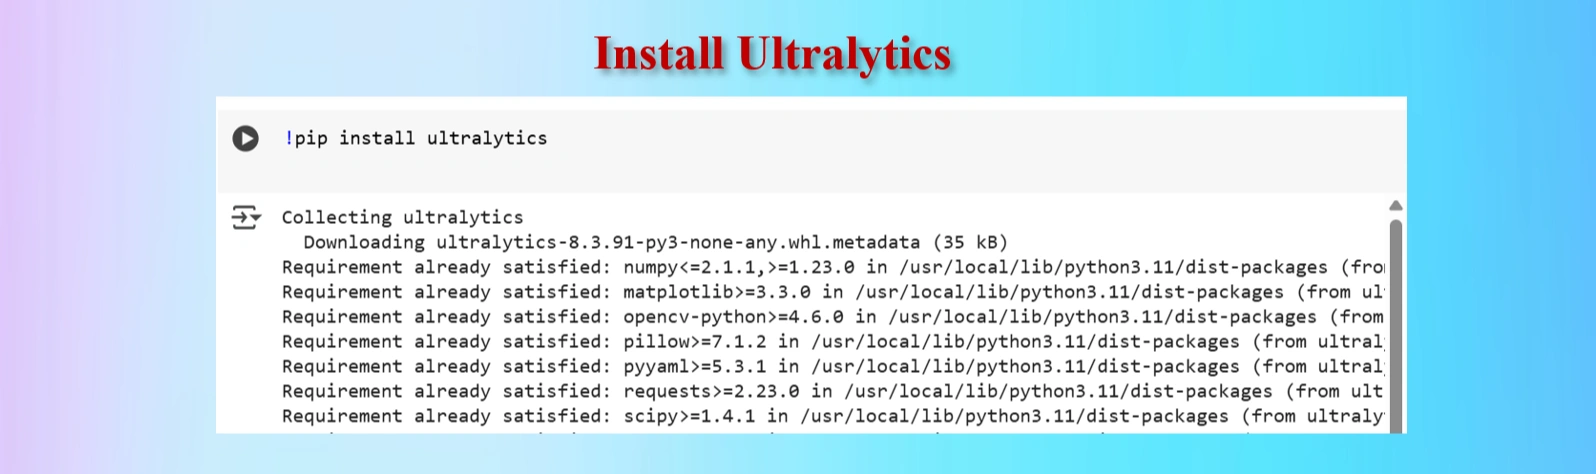
Installed Ultralytics
                CODES:

                #Ultralytics installation
                !pip install ultralytics
Installed Ultralytics
            YOLOV12 Clone Command:

            !git clone https://github.com/sunsmarterjie/yolov12.git
            %cd yolov12
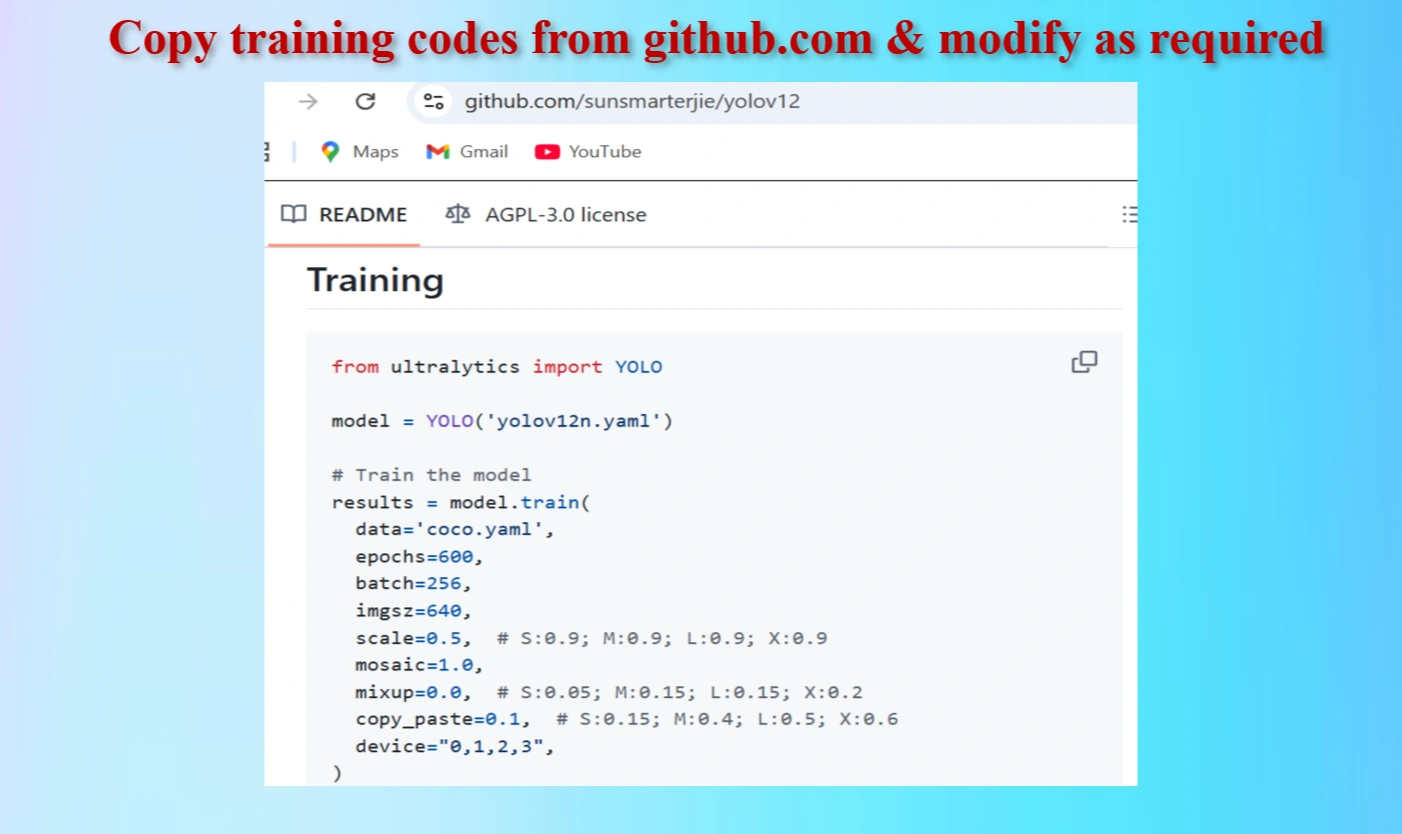
Copied Training Codes & Modify as our requirements
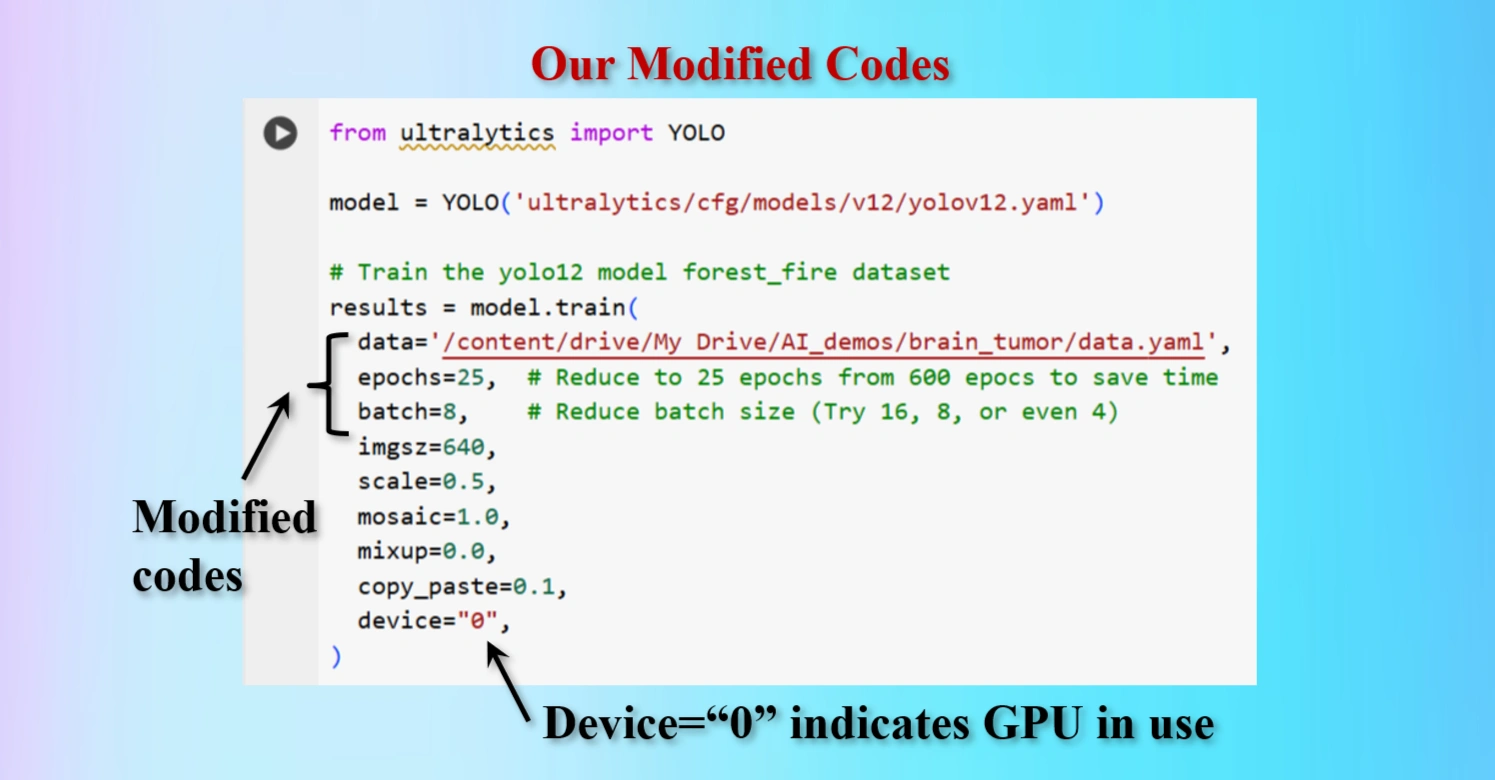
Modified Training codes as per our requirements
We have modifed the codes as below:
        OUR MODIFIED CODES:

            from ultralytics import YOLO

            model = YOLO('ultralytics/cfg/models/v12/yolov12.yaml')

            # Train the yolo12 model forest_fire dataset
            results = model.train(
            data='/content/drive/My Drive/AI_demos/brain_tumor/data.yaml',
            epochs=25,  # Reduce to 25 epochs from 600 epocs to save time
            batch=8,    # Reduce batch size (Try 16, 8, or even 4)
            imgsz=640,
            scale=0.5,
            mosaic=1.0,
            mixup=0.0,
            copy_paste=0.1,
            device="0",
            )
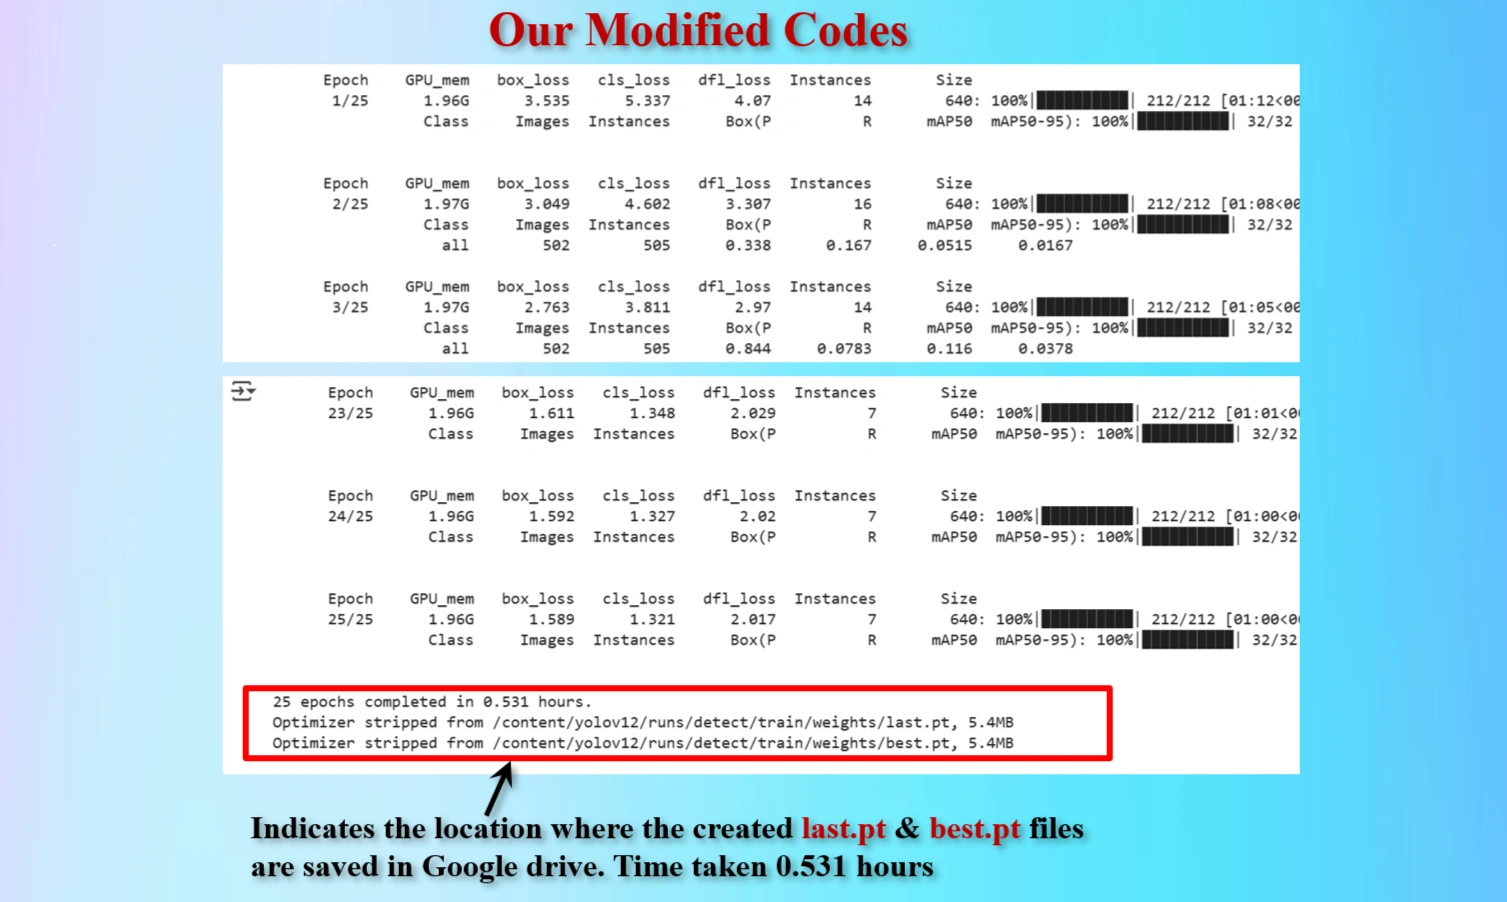
Display shows the locations of created last.pt & best.pt files that are saved.
25 epochs took 0.531 hours.
Therefore, suggested 600 epochs would take 12.75 hours.
To reduce train time we have modified epochs = 25.
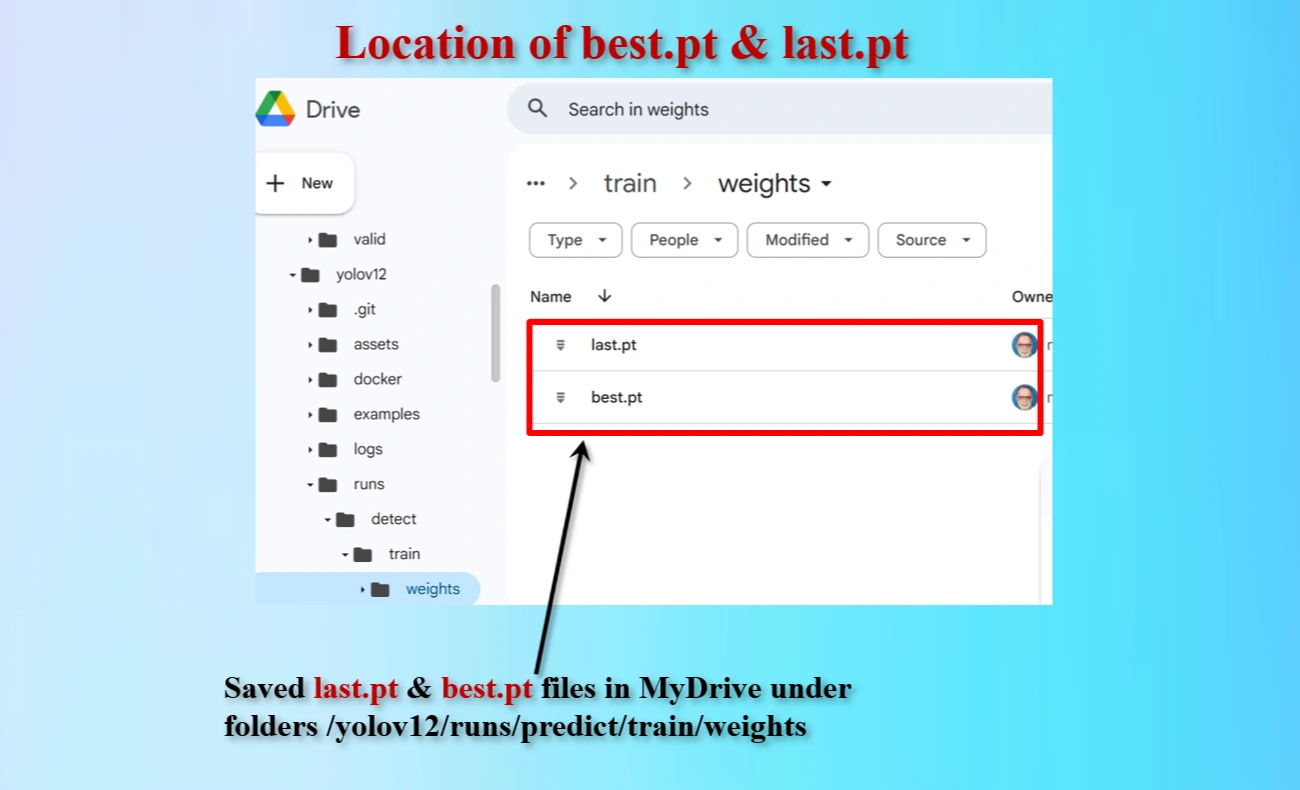
Directory locations of created last.pt & best.pt files that are saved.
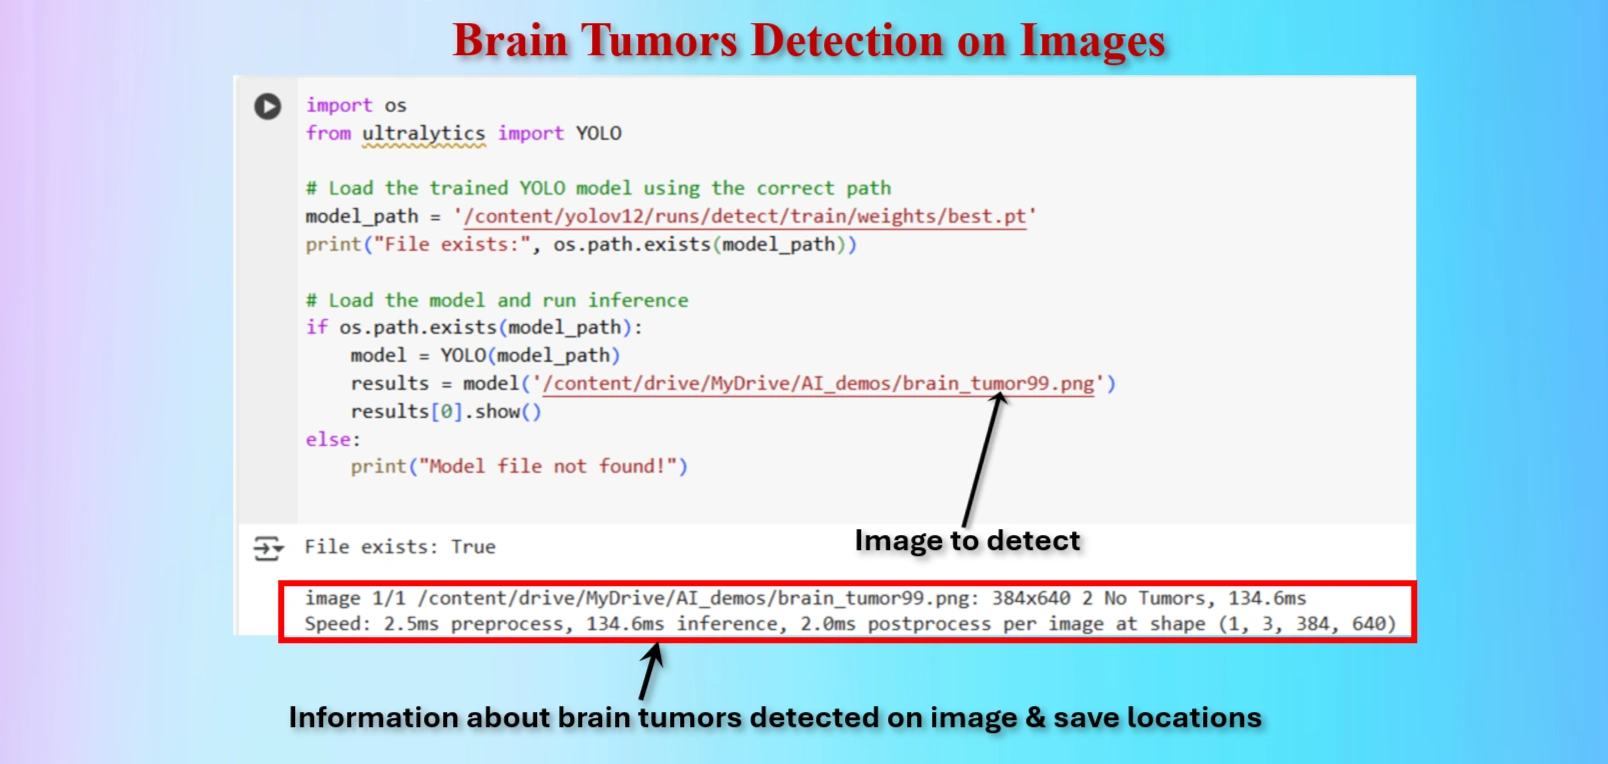
Test the model to detect Brain tumor on an image.
            OUR CODES:

                from ultralytics import YOLO

                # Load the trained YOLO model using the correct path
                model_path = '/content/yolov12/runs/detect/train/weights/best.pt'
                print("File exists:", os.path.exists(model_path))

                # Load the model and run inference
                if os.path.exists(model_path):
                    model = YOLO(model_path)
                    results = model('/content/drive/MyDrive/AI_demos/brain_tumor99.png')
                    results[0].show()
                else:
                    print("Model file not found!")
Similarly we have testeg tumors on the following images:
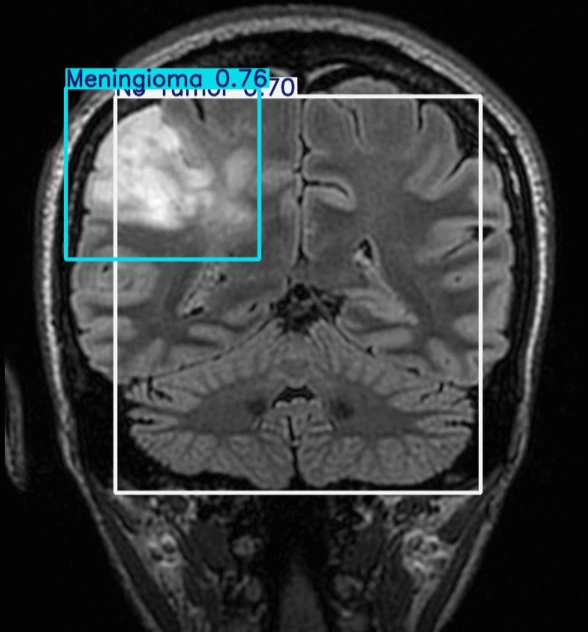
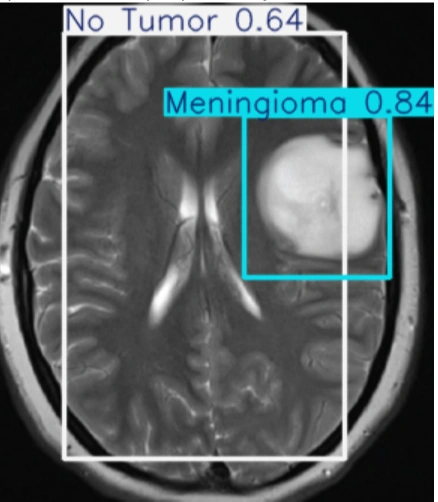
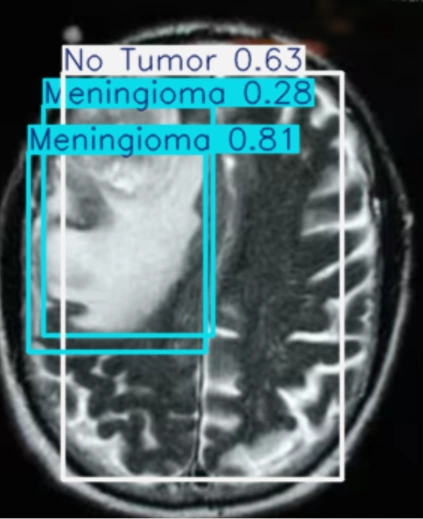
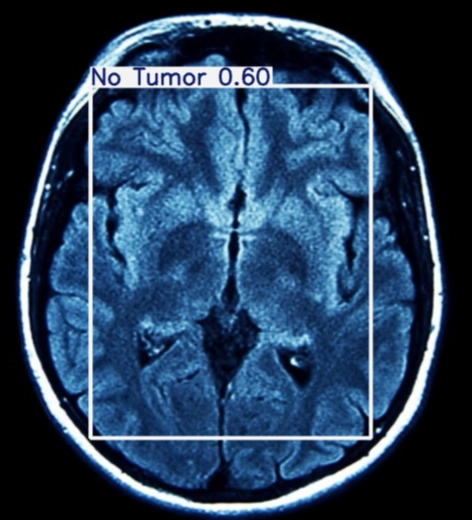
The table showing images before and after tumor detections:
| Serial | Images Before Tumor Detection | Images After Tumor Detection |
|---|---|---|
| 1 | 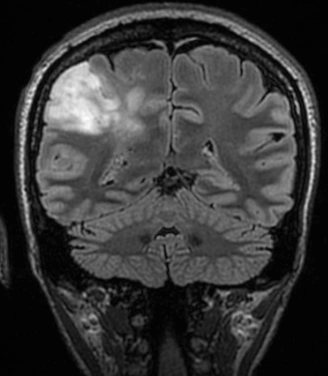 |
 |
| 2 | 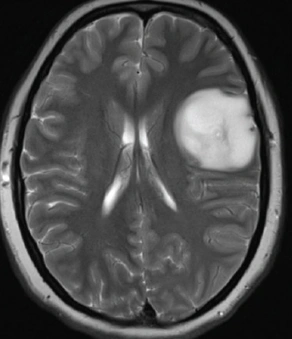 |
 |
| 3 | 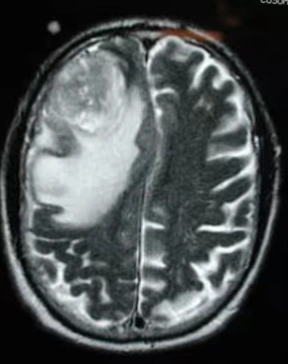 |
 |
| 4 | 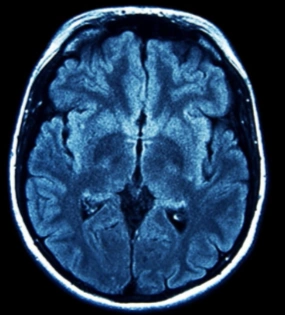 |
 |
| 5 | 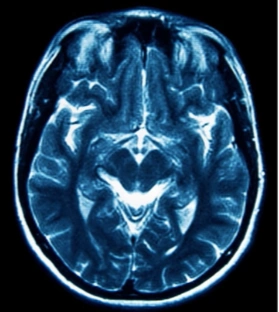 |
 |
Notes:
Using an online GPU, after training the YOLOv12 model with a custom dataset, it successfully detected 75% cases of Brain Tumors. This limitation is primarily due to insufficient training. While it was recommended to run the training for 600 epochs for optimal performance, we completed only 25 epochs to reduce training time. The process took approximately 0.531 hours. Based on this, running the full 600 epochs would require an estimated 12.75 hours using GPU.
However, without a GPU, using a normal CPU would significantly increase the training time. It would take about 9 hours to run 25 epochs. Therefore, completing 600 epochs would take approximately 216 hours, equivalent to about 9 days.
Please try to use online INVIDIA T4 GPU in Google Colab instead of local CPU, to reduce training time of YOLOV12 models on custom datasets
The YOLOv12 training on a custom dataset of brain tumor was completed. The model partially detected the brain tumor, but it could not detect all tumors due to insufficient training epochs. Further training with the recommended number of epochs or additional dataset augmentation may enhance brain tumor detection accuracy.
